

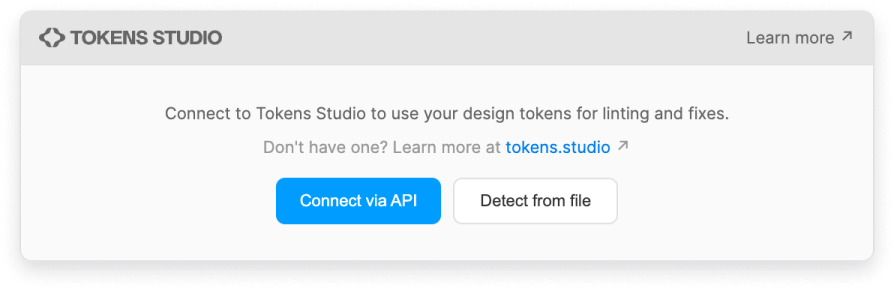
Overview
When you connect Tokens Studio, LintKit reads your token definitions and auto-configures lint rules to match them. Instead of manually entering allowed spacing values, radii, and colors in Settings, LintKit pulls them directly from your tokens and keeps rules in sync with your design system source of truth. This means:- Your spacing scale stays in sync with your tokens — no manual
allowedSpacinglist to maintain - Your corner radii rules automatically reflect your token definitions
- Orphaned color matching uses your token palette as the reference
Why use Tokens Studio with LintKit
Without the integration, you configure LintKit manually — entering allowed spacing values, radii, and color references by hand. This works but creates two sources of truth: your tokens and your LintKit config. When tokens change, your LintKit config drifts. With the integration:- Single source of truth. Token changes automatically update LintKit’s rules. Add a new spacing value to your tokens and LintKit accepts it immediately after a sync.
- Faster onboarding. New team members don’t need to configure LintKit — it reads the team’s tokens and configures itself.
- Token compliance. Strict mode suppresses findings for values that match tokens, so your results only show values that are truly off-system.
- Drift detection. Advisory mode shows you which orphaned values happen to match tokens, helping you identify what should be linked to a style or variable.
Token sources
LintKit supports three ways to read token data. Choose the one that matches where your tokens live.Figma shared plugin data
This is the simplest option. If you already use the Tokens Studio Figma plugin, LintKit reads tokens directly from your file’s shared data with no additional setup.
1
Open LintKit settings
In the plugin, open the Settings panel and navigate to Integrations.
2
Enable Tokens Studio
Toggle on the Tokens Studio integration.
3
Select Figma shared plugin data
Choose Figma shared plugin data as your token source. LintKit detects tokens from the current file automatically.
4
Click Sync
Click Sync to load your tokens. LintKit reads the token definitions and auto-configures your rules.
Tokens Studio API
When to use: Your team manages tokens on the Tokens Studio cloud platform and you want LintKit to fetch them remotely, regardless of which Figma file you have open. How it works: LintKit calls the Tokens Studio GraphQL API using a Bearer token you provide. This fetches your full token set from the cloud, independent of the current Figma file.1
Open LintKit settings
In the plugin, open the Settings panel and navigate to Integrations.
2
Enable Tokens Studio
Toggle on the Tokens Studio integration.
3
Select Tokens Studio API
Choose Tokens Studio API as your token source.
4
Enter your API key
Paste your Tokens Studio API key. This key uses Bearer authentication — LintKit sends it as a
Bearer token in the authorization header.To generate an API key, go to your Tokens Studio workspace settings on the Tokens Studio platform.5
Click Sync
Click Sync to fetch tokens from the Tokens Studio API. LintKit parses the response and auto-configures your rules.
GitHub
When to use: Your tokens live in a GitHub repository rather than the Tokens Studio platform. This is common when your engineering team maintains token files in source control. See the GitHub integration page for full setup instructions, including supported token formats, authentication, and repository configuration.1
Open LintKit settings
In the plugin, open the Settings panel and navigate to Integrations.
2
Enable Tokens Studio
Toggle on the Tokens Studio integration.
3
Select GitHub
Choose GitHub as your token source, then follow the setup on the GitHub integration page.
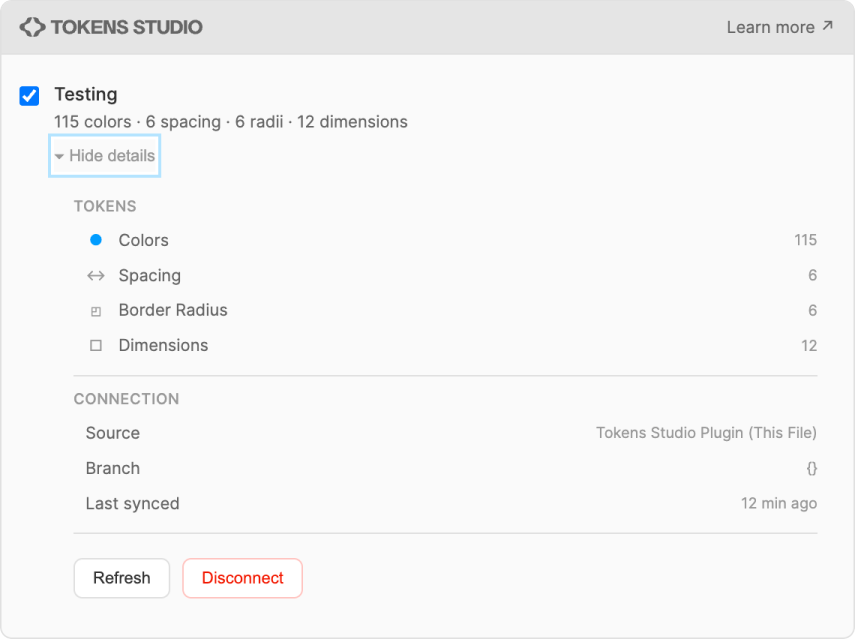
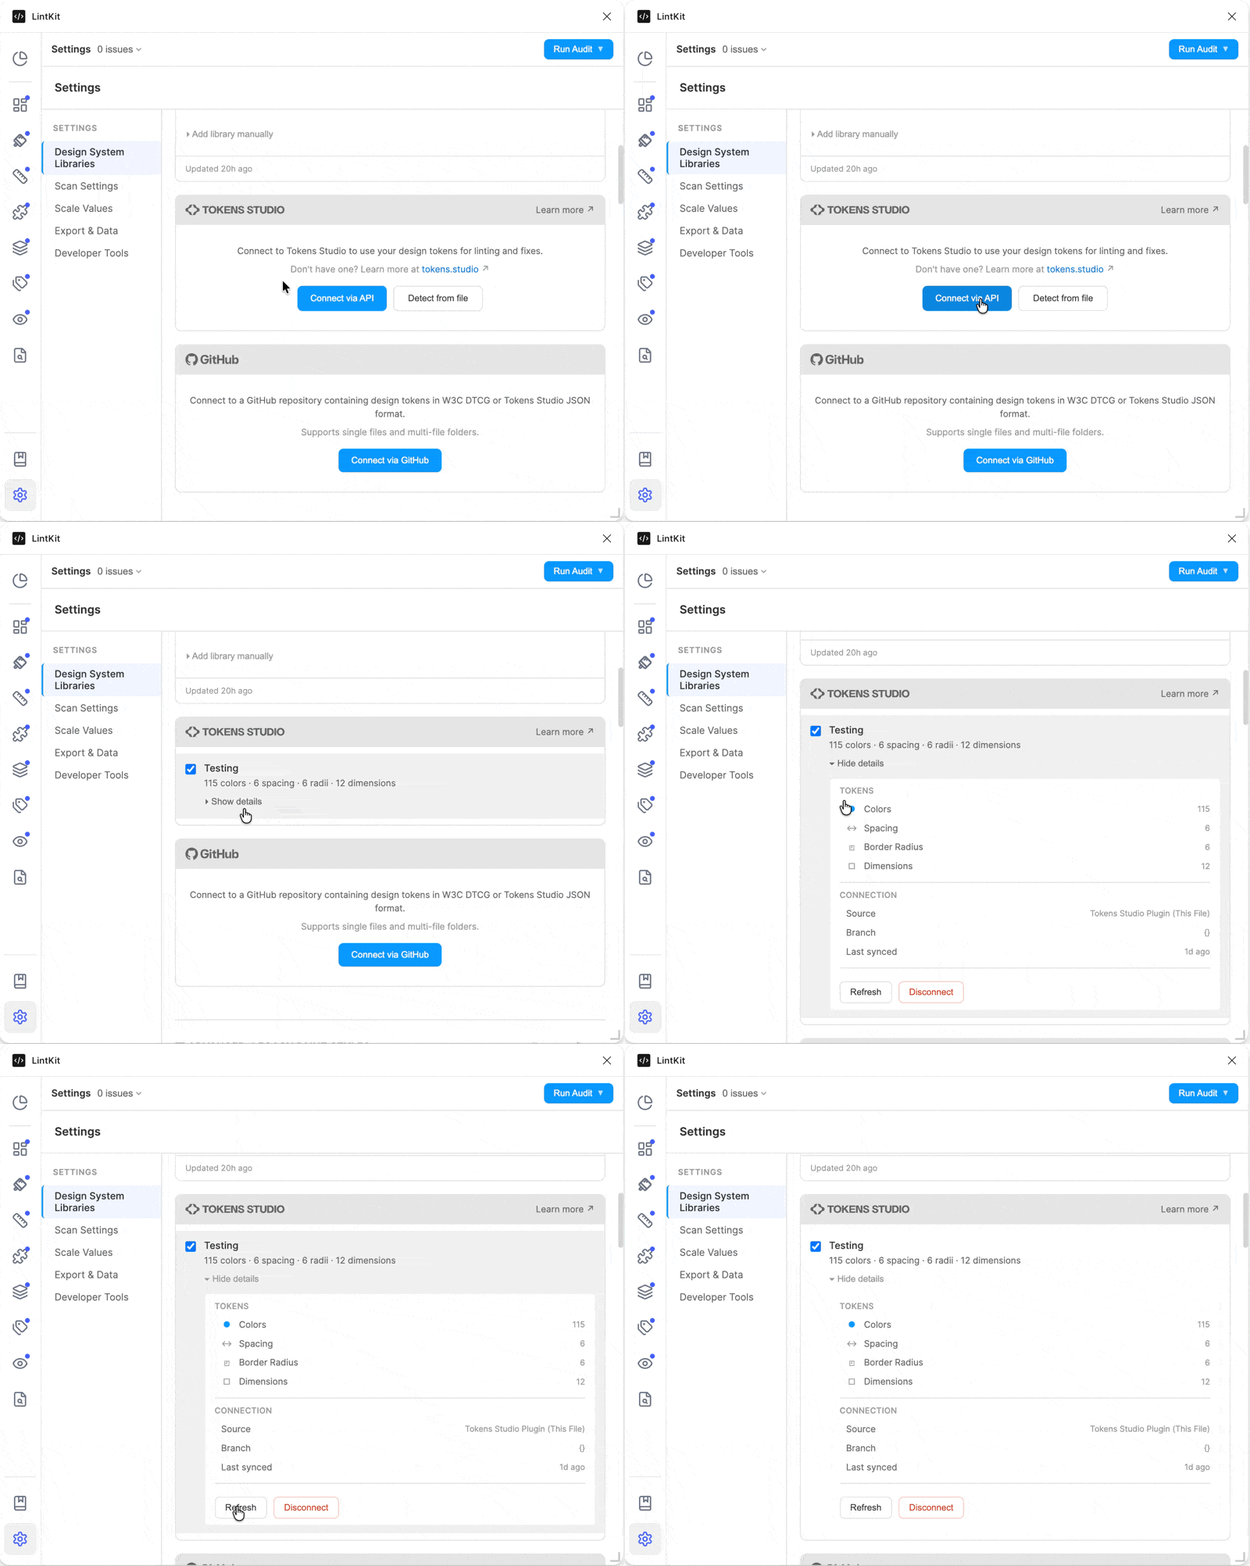
Once connected, the panel shows your project name, token counts, and sync status:
What gets auto-configured
When LintKit syncs tokens, it maps each token type to the corresponding rule configuration:Token values override your manual configuration for the same rule. If you have
allowedSpacing set to [0, 4, 8, 16] and your tokens define spacing values of [0, 4, 8, 12, 16, 24, 32], the token values take precedence when the integration is enabled.Enforcement modes
Enforcement mode controls how LintKit treats values that match your tokens during a scan. Set this in Settings > Integrations after enabling the Tokens Studio integration.Advisory mode
Token values are merged with your manual configuration. Findings still appear, but they include metadata showing which token the value matches. Example: A layer uses an orphaned fill with the hex value#3B82F6. In advisory mode, LintKit still reports it as a finding (because the fill is not linked to a style), but the inspector notes that the value matches your primary/blue token. This helps you decide whether to link it to the corresponding style or leave it as-is.
When to use advisory mode:
- You are starting with the integration and want to see the full picture before suppressing anything
- Your team is migrating to tokens and you want visibility into which values already match
- You want findings to appear but with added token context for better decision-making
Strict mode
If a design value matches a token definition, the finding is suppressed entirely. LintKit treats token-matched values as valid. Example: A layer uses an orphaned fill with the hex value#3B82F6 that matches your primary/blue token. In strict mode, this finding does not appear in the results at all — LintKit considers the value valid because it matches a known token.
When to use strict mode:
- Your team trusts the token system and only wants to see values that fall outside it
- You have already reviewed your token coverage and are confident in the definitions
- You want a cleaner results list focused only on values that are genuinely off-system
Token type toggles
You can independently control which token types LintKit enforces:Cache and syncing
Cache behavior
Token values are cached for 30 seconds after fetching. During this window, re-opening the plugin or switching pages uses the cached values without making a new request. Click Sync in the Integrations panel to force a refresh at any time, regardless of cache state.Auto-sync
WhentokensStudio.autoSync is enabled (the default), LintKit re-fetches tokens automatically each time the plugin opens. This keeps your rules in sync without manual intervention.
Turn auto-sync off if:
- You prefer to control exactly when tokens are refreshed
- You are on a slow network and want to avoid the fetch on every plugin open
- You are debugging token configuration and want a stable baseline
Best practices
Start with advisory, graduate to strict
When you first connect Tokens Studio, use advisory mode. This lets you see the full picture — which orphaned values match tokens and which don’t. After reviewing the results across several files and confirming your tokens are comprehensive, switch to strict mode for a cleaner results list.Keep your token types aligned
If your tokens only cover colors and spacing but not radii, turn offtokensStudio.enforceRadii and keep your manual allowedRadii configuration. Enabling a token type toggle when you have no tokens of that type effectively clears the allowed list, which can cause unexpected behavior.
Sync after token updates
When your team updates tokens (new colors, changed spacing values), click Sync in LintKit to pick up the changes. If you havetokensStudio.autoSync enabled, this happens automatically the next time you open the plugin — but it won’t happen mid-session unless you click Sync.
Use LintKit as a validation layer after token syncs
After syncing new tokens in Tokens Studio (or pushing token changes via GitHub), open LintKit and scan your file. LintKit acts as a validation layer — it shows you which parts of your design are now out of compliance with the updated tokens. This is especially useful after:- Adding new spacing values and removing deprecated ones
- Changing color token values
- Reorganizing your token hierarchy
Token organization for best results
LintKit maps tokens by type, so your token structure matters:- Color tokens should use
$type: "color"(DTCG) or be organized under a recognizable color category - Spacing tokens should use
$type: "dimension"and be organized under spacing-related categories - Border radius tokens should use
$type: "dimension"and be organized under radius-related categories
Collaborative token workflows
A common challenge with Tokens Studio is managing tokens when multiple designers work on the same design system simultaneously. When two designers create tokens at the same time and sync to the same repository, one person’s changes can overwrite the other’s.The overwrite problem
This happens because Tokens Studio writes the entire token set as a single file. When Designer A and Designer B both create tokens and push to the same branch:- Designer A creates tokens X and pushes
- Designer B (who pulled before A pushed) creates tokens Y and pushes
- Designer B’s push overwrites Designer A’s tokens X because B’s local copy didn’t include them
How to prevent it
Use branches for concurrent work
Use branches for concurrent work
The most reliable solution is for each designer to work on a separate Git branch:
- Designer A creates a branch
tokens/update-spacingand works there - Designer B creates a branch
tokens/new-colorsand works there - Both push to their own branches without conflict
- Merge branches into
mainone at a time, resolving any conflicts in the JSON
Split tokens into smaller files
Split tokens into smaller files
If your token repository supports it, split tokens into separate files by category (colors.json, spacing.json, radii.json, typography.json). When two designers edit different categories, their changes don’t conflict.LintKit currently points to a single token file, so you’ll need a build step that merges your split files into one combined file that LintKit can read. Many teams already have this as part of their Style Dictionary or token build pipeline.
Establish a pull-before-push workflow
Establish a pull-before-push workflow
If branching isn’t practical, establish a team convention:
- Always pull the latest tokens before starting work
- Make your changes
- Pull again before pushing to catch any changes made while you were working
- Resolve any conflicts before pushing
Designate token ownership areas
Designate token ownership areas
Assign different parts of the token system to different designers:
- Designer A owns color tokens
- Designer B owns spacing and layout tokens
- Designer C owns typography tokens
Using LintKit to catch drift after merges
After merging token branches or resolving conflicts, run LintKit on your design files to validate that the merged tokens are correct. LintKit will show you:- Whether any spacing values are now off-scale (if spacing tokens were changed)
- Whether any orphaned fills no longer match token colors (if color tokens were changed)
- Whether broken variable references appeared (if token names were changed)
All configuration options
Troubleshooting
Sync completes but no rules are auto-configured
Sync completes but no rules are auto-configured
LintKit fetched your tokens but could not find recognized token types. Verify that your token set includes color, spacing, or borderRadius tokens with standard
$type values (DTCG) or recognizable category names (nested format). If you are using Figma shared plugin data, make sure the Tokens Studio plugin has been run on this file at least once.API key is rejected
API key is rejected
If you are using the Tokens Studio API source, verify that your API key is correct and has not expired. Generate a new key from your Tokens Studio workspace settings. Do not include the word “Bearer” when pasting — LintKit adds that prefix automatically.
Tokens are stale or outdated
Tokens are stale or outdated
Click Sync to force a fresh fetch. If auto-sync is on, tokens refresh when the plugin opens, but changes made after the plugin opened are not picked up until you click Sync again or reopen the plugin.
Network errors when syncing
Network errors when syncing
The Tokens Studio API and GitHub sources require network access. If you are on a restricted network (corporate firewall, VPN), make sure the plugin can reach the relevant endpoints. The Figma shared plugin data source does not require network access.
Token values conflict with manual configuration
Token values conflict with manual configuration
When the integration is enabled and a token type toggle is on, token values take precedence over your manual configuration. If you see unexpected values in your allowed lists, check whether the integration is overriding them. Turn off the specific toggle (for example,
tokensStudio.enforceSpacing) to revert to your manual values.Variables disconnected after renaming tokens
Variables disconnected after renaming tokens
If you rename tokens in the Tokens Studio platform (rather than in the Figma plugin), Figma variables can lose their connection. This is a Tokens Studio behavior — renaming on the platform creates a new token and deletes the old one, which breaks the variable binding in Figma.Workaround: Rename tokens in the Tokens Studio Figma plugin instead of the platform. The plugin propagates the rename to the Figma variable, keeping the binding intact. After renaming, run LintKit’s Broken Variables check to confirm no references were lost.
Theme switching not reflecting in designs
Theme switching not reflecting in designs
If switching themes in Tokens Studio doesn’t update your designs visually, the variables may have lost their connection to the design layers. This can happen after re-exporting tokens or changing theme configurations.Run a LintKit scan — the Broken Variables rule catches disconnected variable bindings. Detach the broken bindings and re-apply the correct variables.
Multiple designers seeing different token versions
Multiple designers seeing different token versions
If team members see different token versions in the Tokens Studio plugin, they may be working from different local states. Each designer’s plugin instance maintains its own local copy.Fix: Have all designers pull the latest tokens from the shared source (GitHub, Tokens Studio API) before starting work. Use LintKit to validate — if two designers scan the same file and get different results, their tokens are out of sync.